Prerequisites
- Must provision users in both Tableau and Okta with matching username or email address.
- Tableau version 21.4 or later
- SSO over SAML for Tableau with Okta as IdP
- Assumes Tableau is already configured for SSO via Okta (Okta.com NOT auth0.com)
Customer Steps
Create new Okta App Integration
- Within Okta.com, expand Applications in the left hand navigation then click Applications below that. Then click Create App Integration. Select SAML 2.0 and click Next.
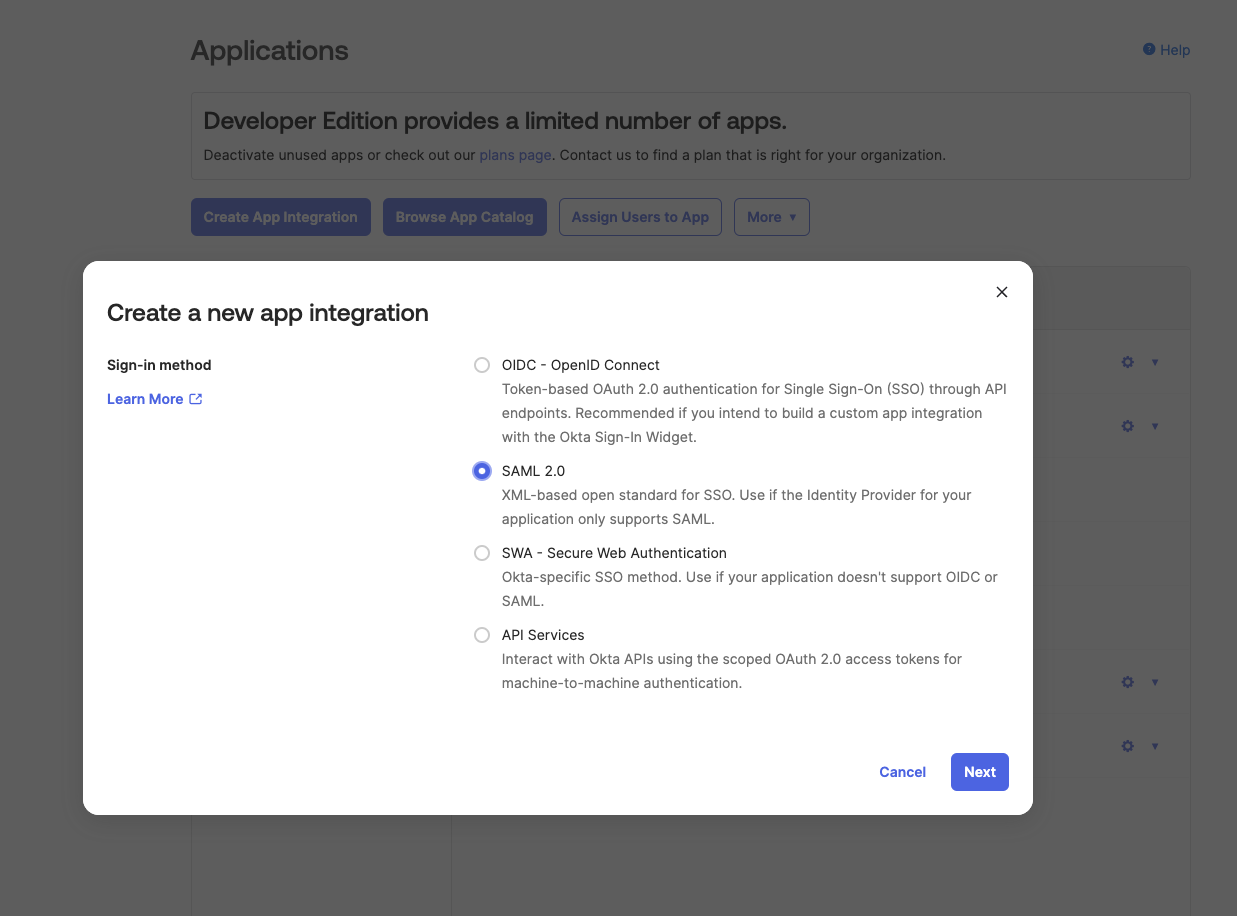
- Give the app a name such as Zuar Portal and click Next.
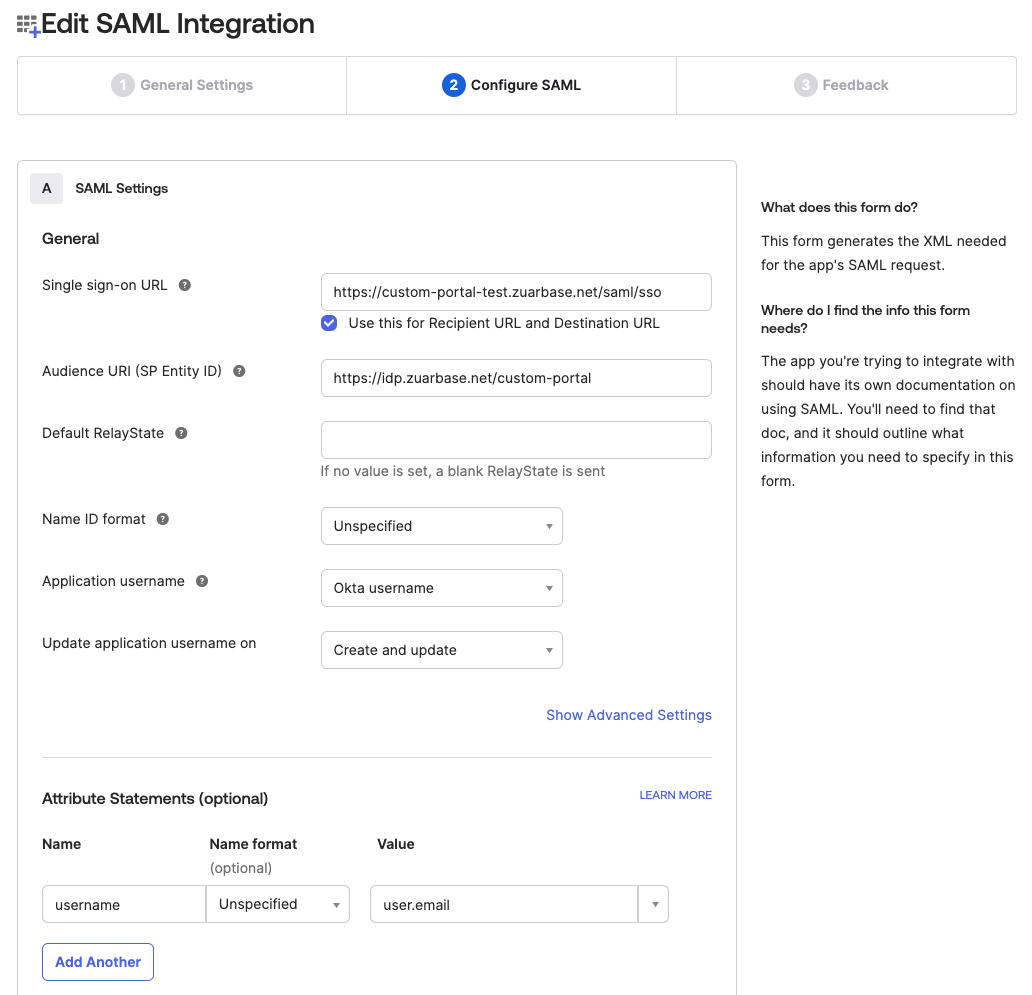
- Fill in the values on the Configure SAML page as follows:
- Single sign-on URL (also known as the Assertion Consumer Service / ACS URL):
https://<your-portal-url>/login(replace<your-portal-url>with your actual Portal URL, e.g.https://example.zuarbase.net)- Check “Use this for Recipient URL and Destination URL”
- Audience URI (SP Entity ID): Enter the Zuar Portal URL, e.g.
https://example.zuarbase.net - Default RelayState: leave blank
- Name ID format: Unspecified
- Application username: Okta username
- Update application username on: Create and update
- Attribute Statements
- Name: username
- Name Format: Unspecified
- Value: user.email
- Click Show Advanced Settings
- Signature Certificate: Upload the saml.cert file provided by Zuar
- Check Enable Single Logout
- Single Logout URL:
https://<your-portal-url>/logout - SP Issuer: same as Audience URI above (your Zuar Portal URL, e.g.
https://example.zuarbase.net) - Signed Requests: Unchecked
- Single sign-on URL (also known as the Assertion Consumer Service / ACS URL):
Send Metadata to Zuar
- After saving the previous steps, go back to Applications, click on the application you just created named Zuar Portal and then click on the Sign On tab.
- Copy the Metadata URL and send to your Zuar representative.
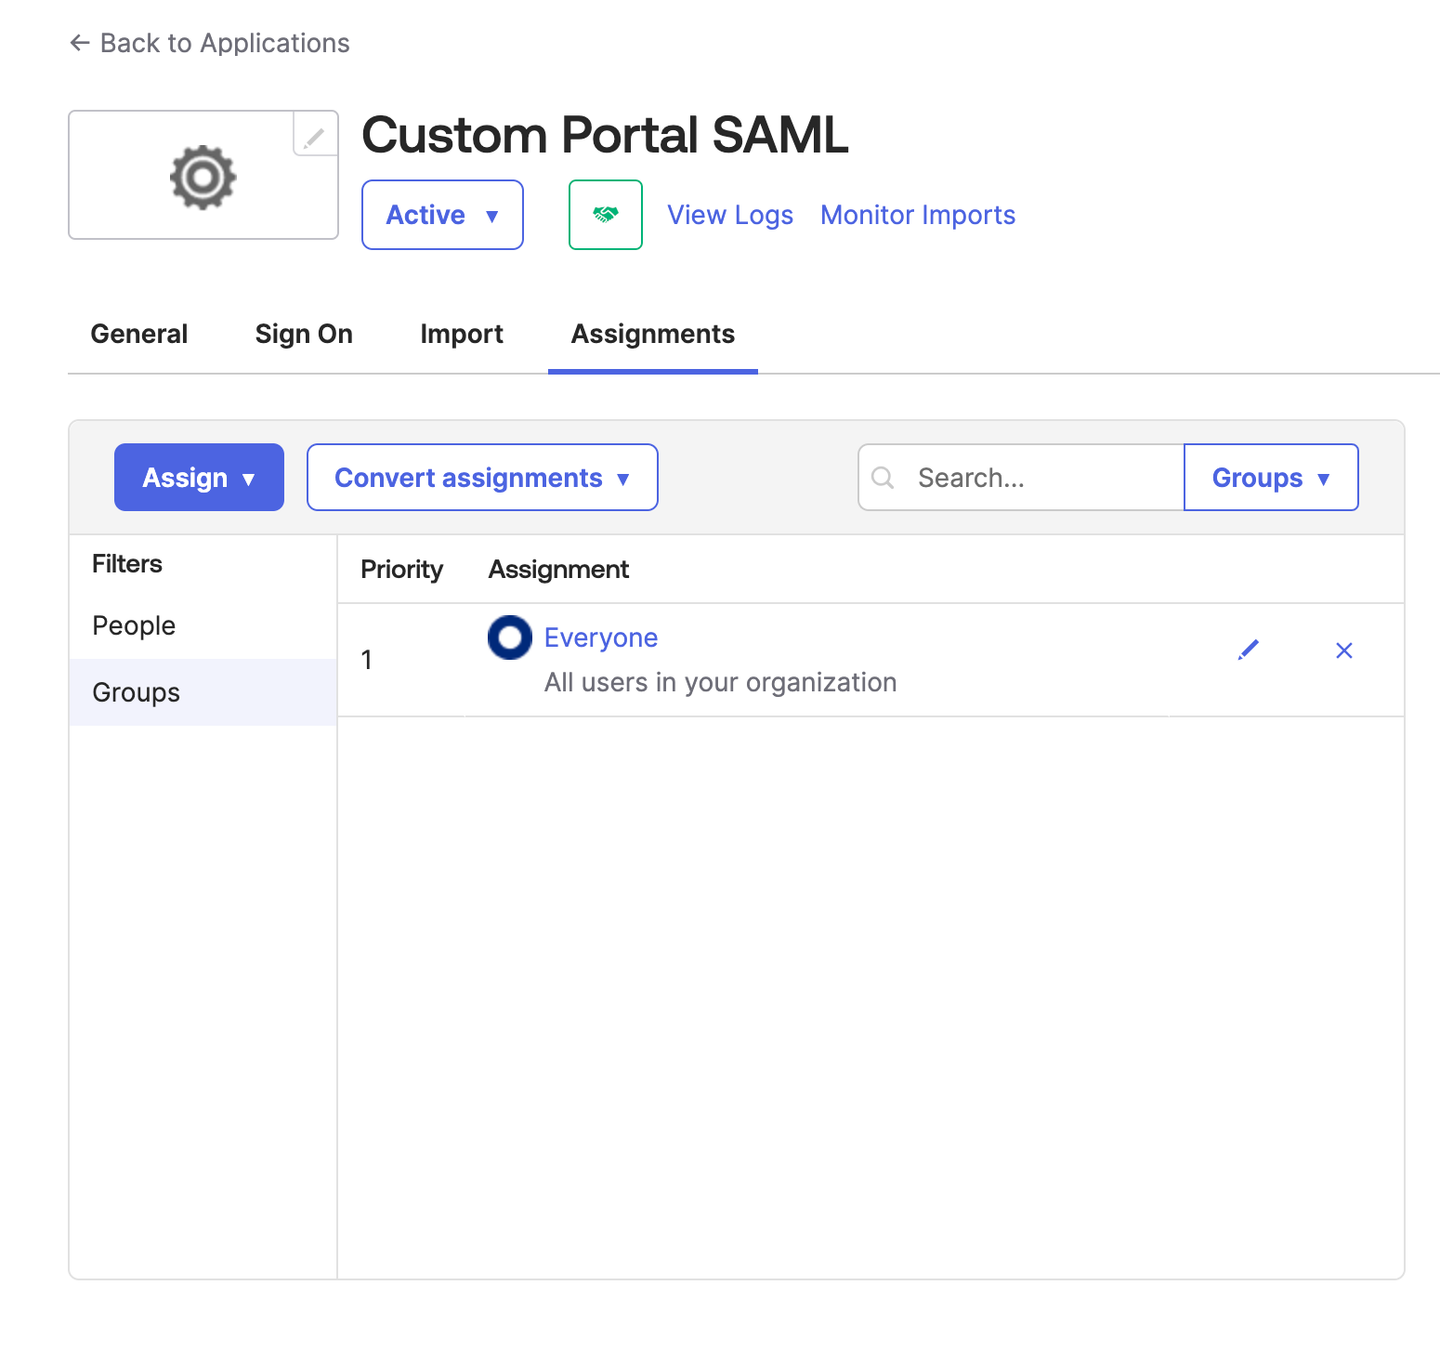
Assign users to Zuar Portal application in Okta
You can assign users individually, or assign all users in a group (such as the All Users in Org group).
- Edit the Okta Zuar Portal application and click on the Assignments tab
- Click the Assign button and then Assign to People or Assign to Group.
- Assign all users or groups you wish to be able to sign in to the Portal and click Done.
Create Tableau Connected App
Login to Tableau as an admin and create a Connected App
- Settings > Connected Apps > New Connected App > Direct Trust
- Enter a name for the App such as “Zuar Portal” and click Create.
- Click Generate New Secret.
- Click “Back to Connected Apps”
- Click the three dots on the row for the Connected App and click Enable.
- Send the following values from the newly created Connected App to Zuar:
- Client ID
- Secret ID
- Secret Value