Content Packs
A content pack is a self-contained, shareable bundle of portal objects. Content packs let you reuse curated content — dashboards, blocks, themes, and everything they depend on — by importing ready-made packs into your portal.
A pack can contain pages, blocks, queries, data sources, themes, partials, snippets, and assets. Dependencies (such as the assets a theme uses, or the queries a block runs) are included automatically. When you import a pack, object IDs are remapped so it applies cleanly to your portal, and you assign your own credentials to any data sources it brings in.
Portal administrators can browse the Zuar-managed library of ready-made content packs.
Browsing Content Packs
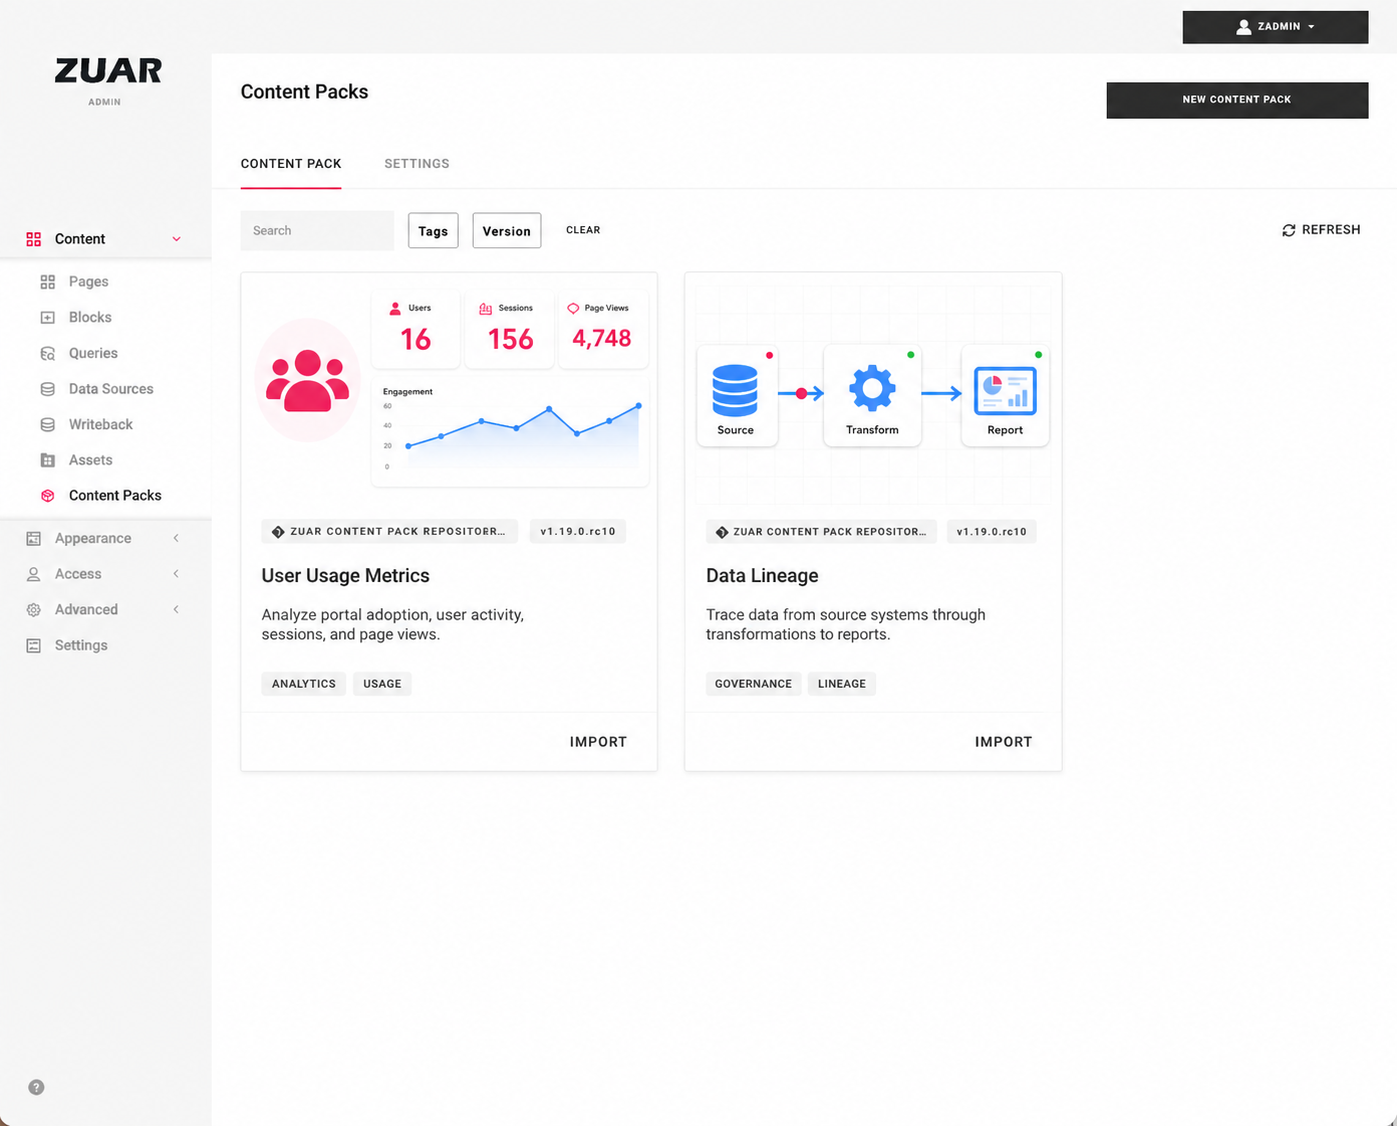
In the admin console, go to Content Packs. Each available pack appears as a card showing its thumbnail, name, version, description, and tags. Each card has an IMPORT button at its bottom-right, and a menu with Details and Delete.
Packs are listed in alphabetical order by name. The list loads a batch at a time: as you scroll toward the bottom, the next batch of packs loads automatically, so a large library stays responsive instead of loading everything at once.
The library refreshes periodically. Click Refresh to check for newly published packs immediately.
Importing a pack
- Click IMPORT at the bottom-right of a pack's card.
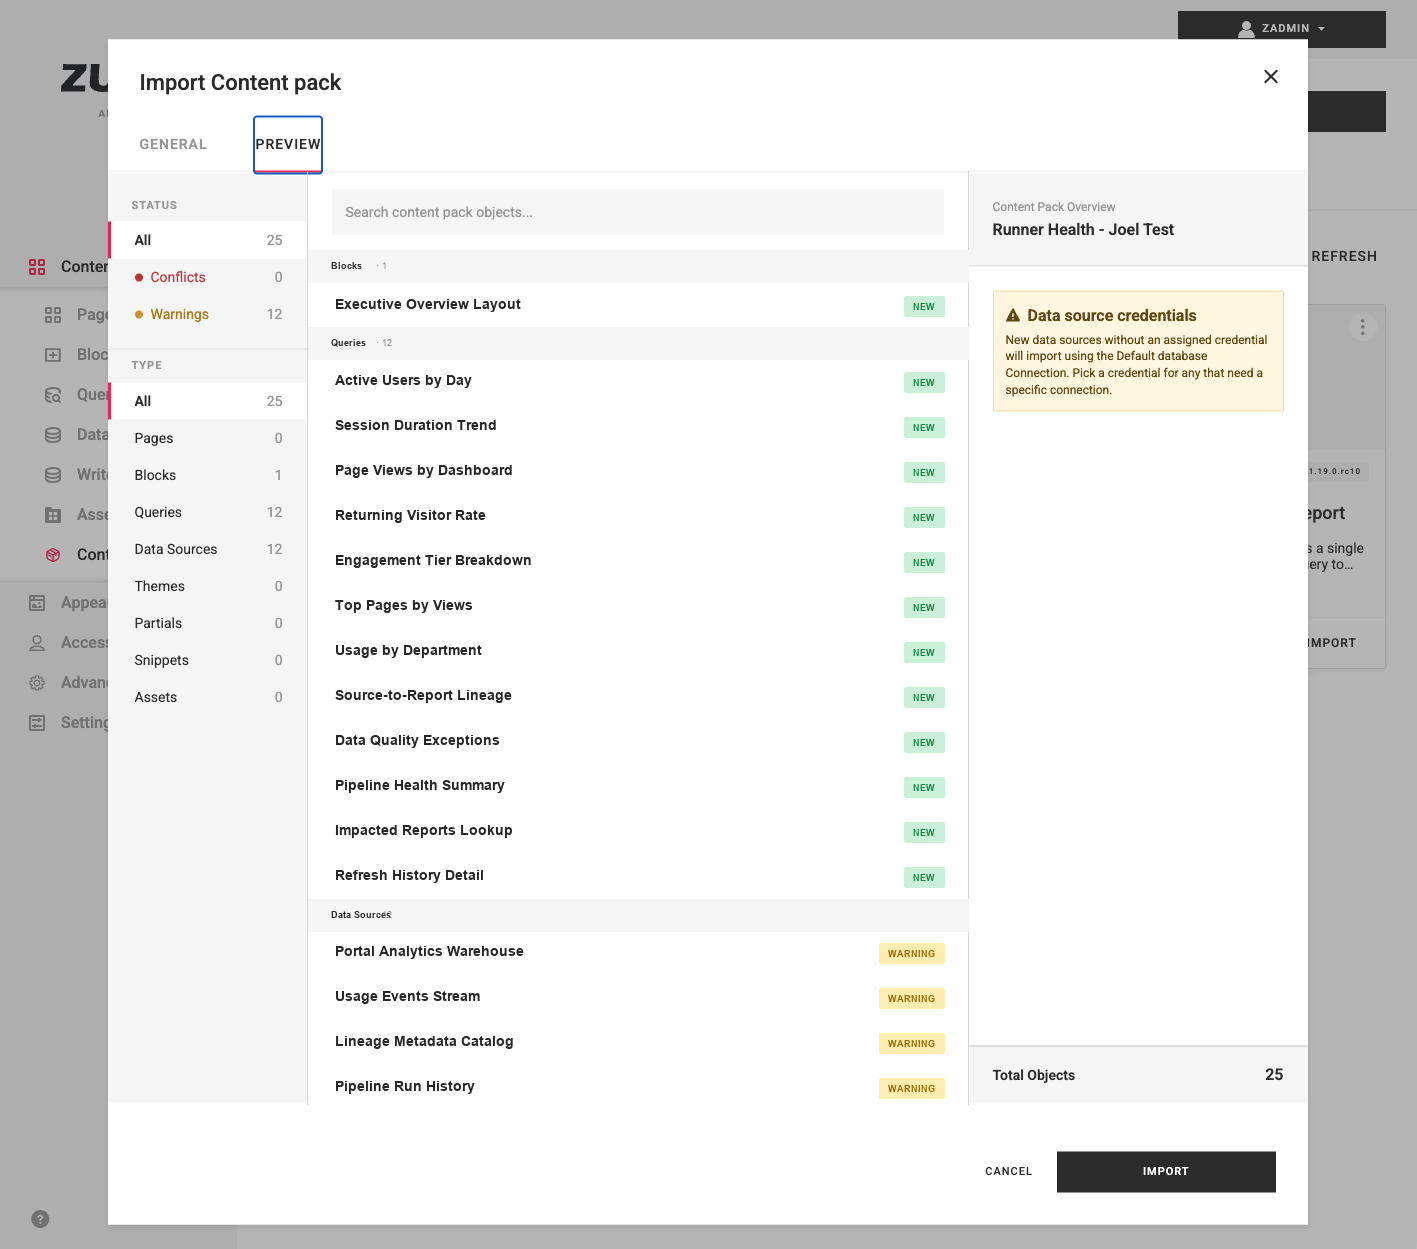
- Open the Preview tab. Each object is analyzed against your portal and labeled NEW or CONFLICT.
- Resolve any conflicts by choosing Skip or Overwrite — individually, or with a single default for all conflicts.
- For new data sources, assign a database connection (otherwise the default database is used). For new chatbot blocks, assign an LLM connection.
- Click Import.
Note
A conflict means this same pack previously imported that object into your portal — it is not a simple name collision. Choose Skip to keep the existing object or Overwrite to replace it.
Publishing content packs
If you run more than one portal, you can publish your own content packs to share content between them. Publishing writes a pack to a git repository that your other portals can then browse and import.
Connect your repository
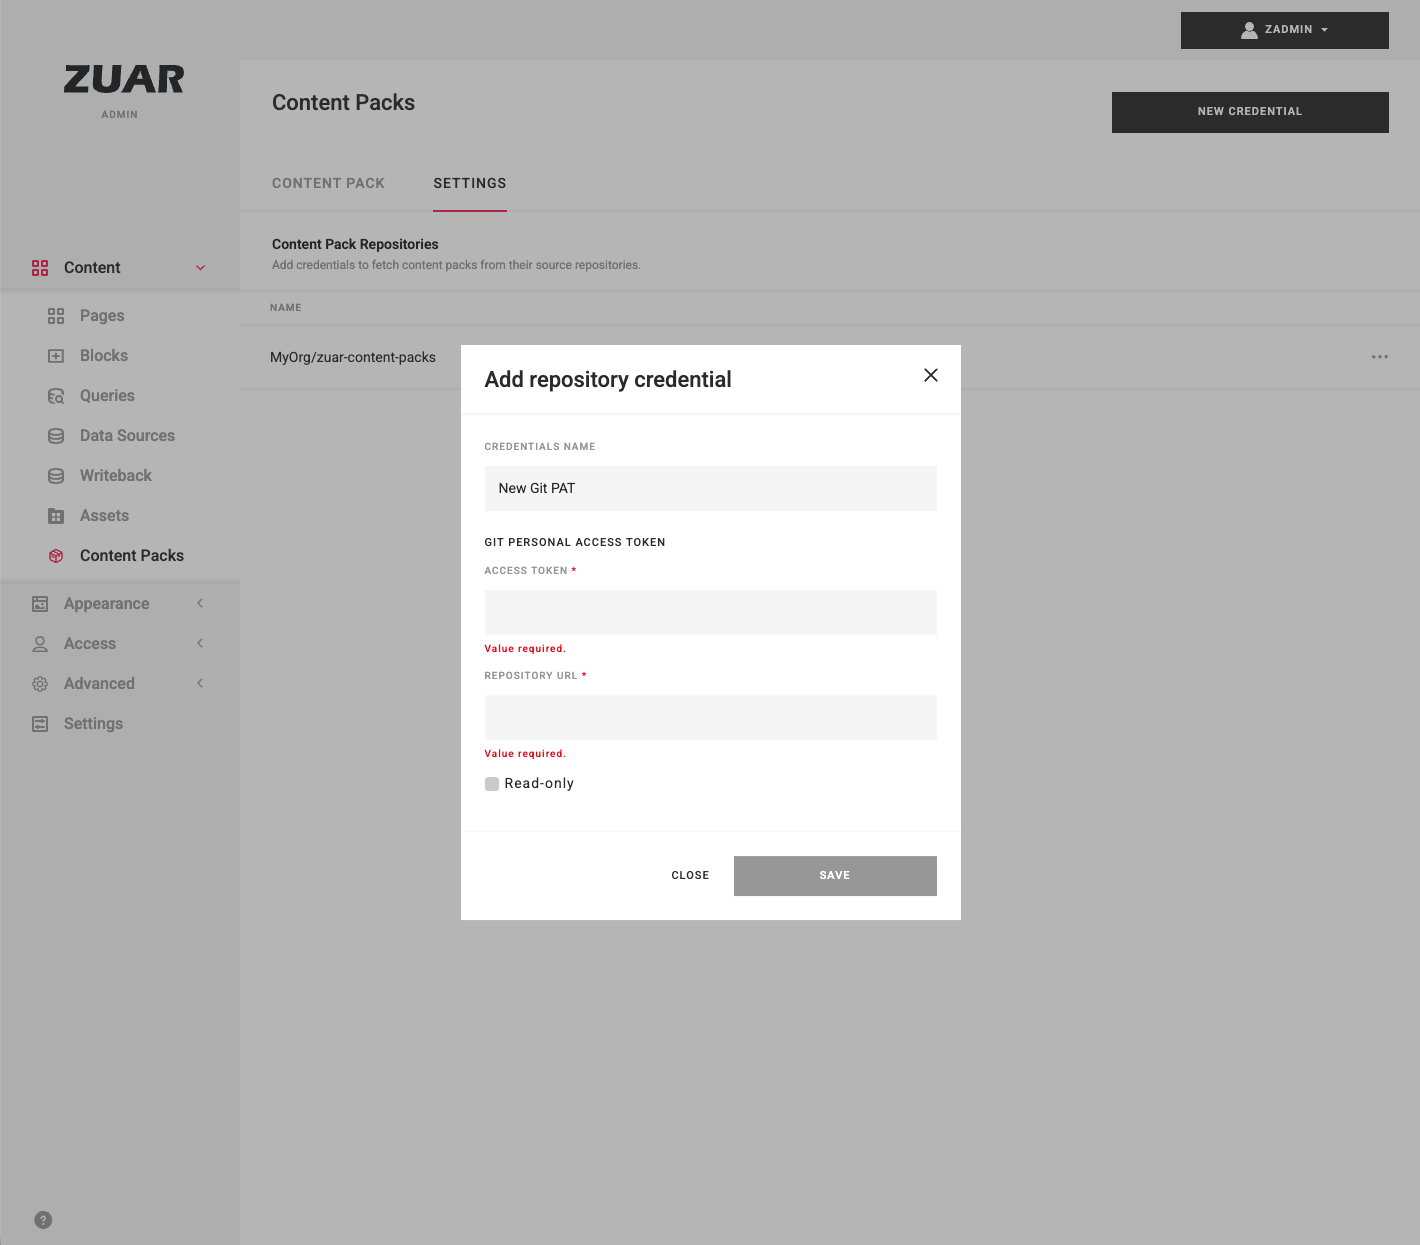
On the Settings tab, under Content Pack Repositories, click New Credential and add your repository as a GIT Personal Access Token:
- the repository URL — the HTTPS clone URL, for example
https://github.com/your-org/your-packs, - a GitHub personal access token with access to that repository (see Token permissions), and
- a read-only option for repositories you only import from. Portal refuses to publish to a repository marked read-only.
The repository may be empty. Packs are stored in a content-packs/<slug>/ directory at the root of the repository, which Portal creates the first time you publish.
HTTPS URLs only
Portal sends the token as HTTPS credentials. An SSH URL such as git@github.com:your-org/your-packs.git receives no credentials and the connection fails.
Token permissions
Portal uses the token for git alone: it clones, fetches, commits, and pushes to the one repository named in the credential. It calls no other provider API, so the token needs no access to issues, pull requests, workflows, packages, or organization settings.
For a GitHub fine-grained personal access token:
| Setting | Value |
|---|---|
| Resource owner | The user or organization that owns the repository |
| Repository access | Only select repositories, then choose the pack repository |
| Repository permissions → Contents | Read-only to import packs; Read and write to publish packs |
| Repository permissions → Metadata | Read-only — GitHub grants this automatically and requires it |
For a GitHub classic personal access token, repo is the smallest scope that works with a private repository, whether you import or publish — classic tokens cannot grant read-only access to repository contents. For a public repository, public_repo is enough to publish.
Organization and branch rules
- If the organization enforces SAML single sign-on, authorize the token for that organization after creating it. Fine-grained tokens may also need approval from an organization owner before they work.
- Publishing pushes a commit straight to the repository's default branch (
mainormaster). A branch protection rule that requires a pull request or a review rejects that push regardless of what the token is permitted to do.
GitHub is the tested provider. Other git hosts may work, but Portal sends a fixed x-access-token user name alongside the token, and not every provider accepts it.
Publish a pack
- On the Content Pack tab, click New Content Pack.
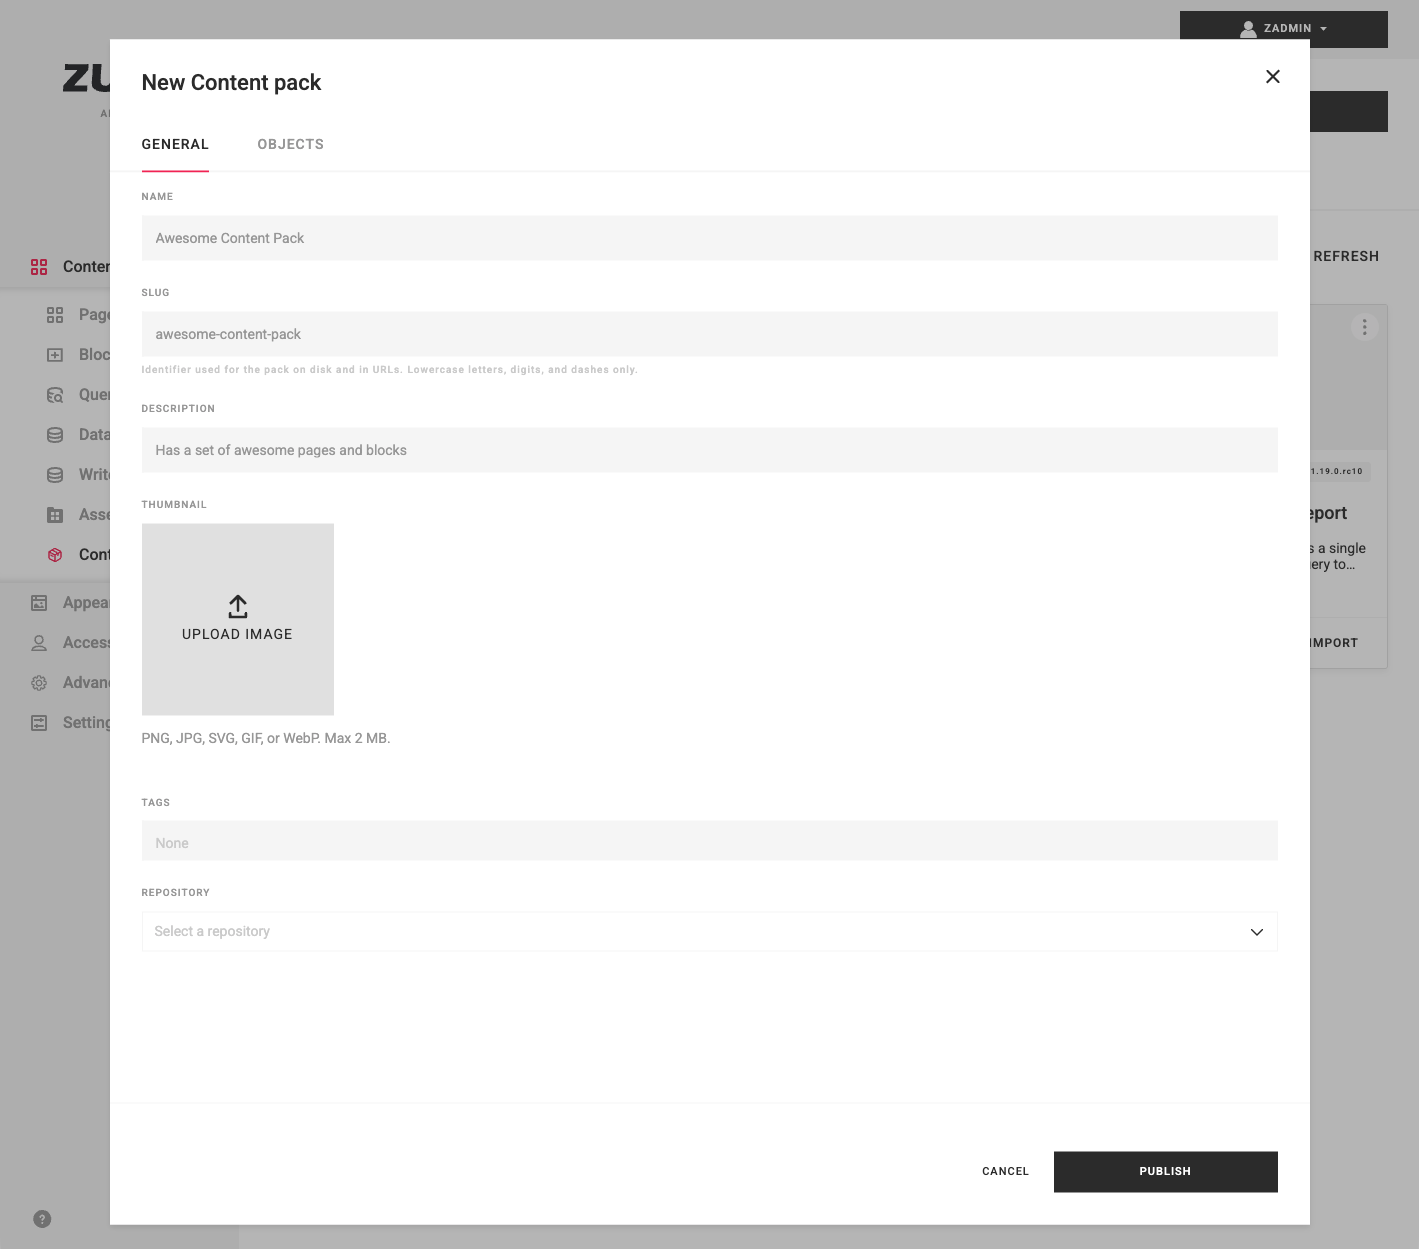
- On the General tab, enter:
- Name.
- Slug — an identifier used in URLs (lowercase letters, digits, and dashes). It is derived from the name until you edit it.
- Description.
- Thumbnail — an optional image (PNG, JPG, SVG, GIF, or WebP; max 2 MB).
- Tags.
- Repository — the repository to publish to.
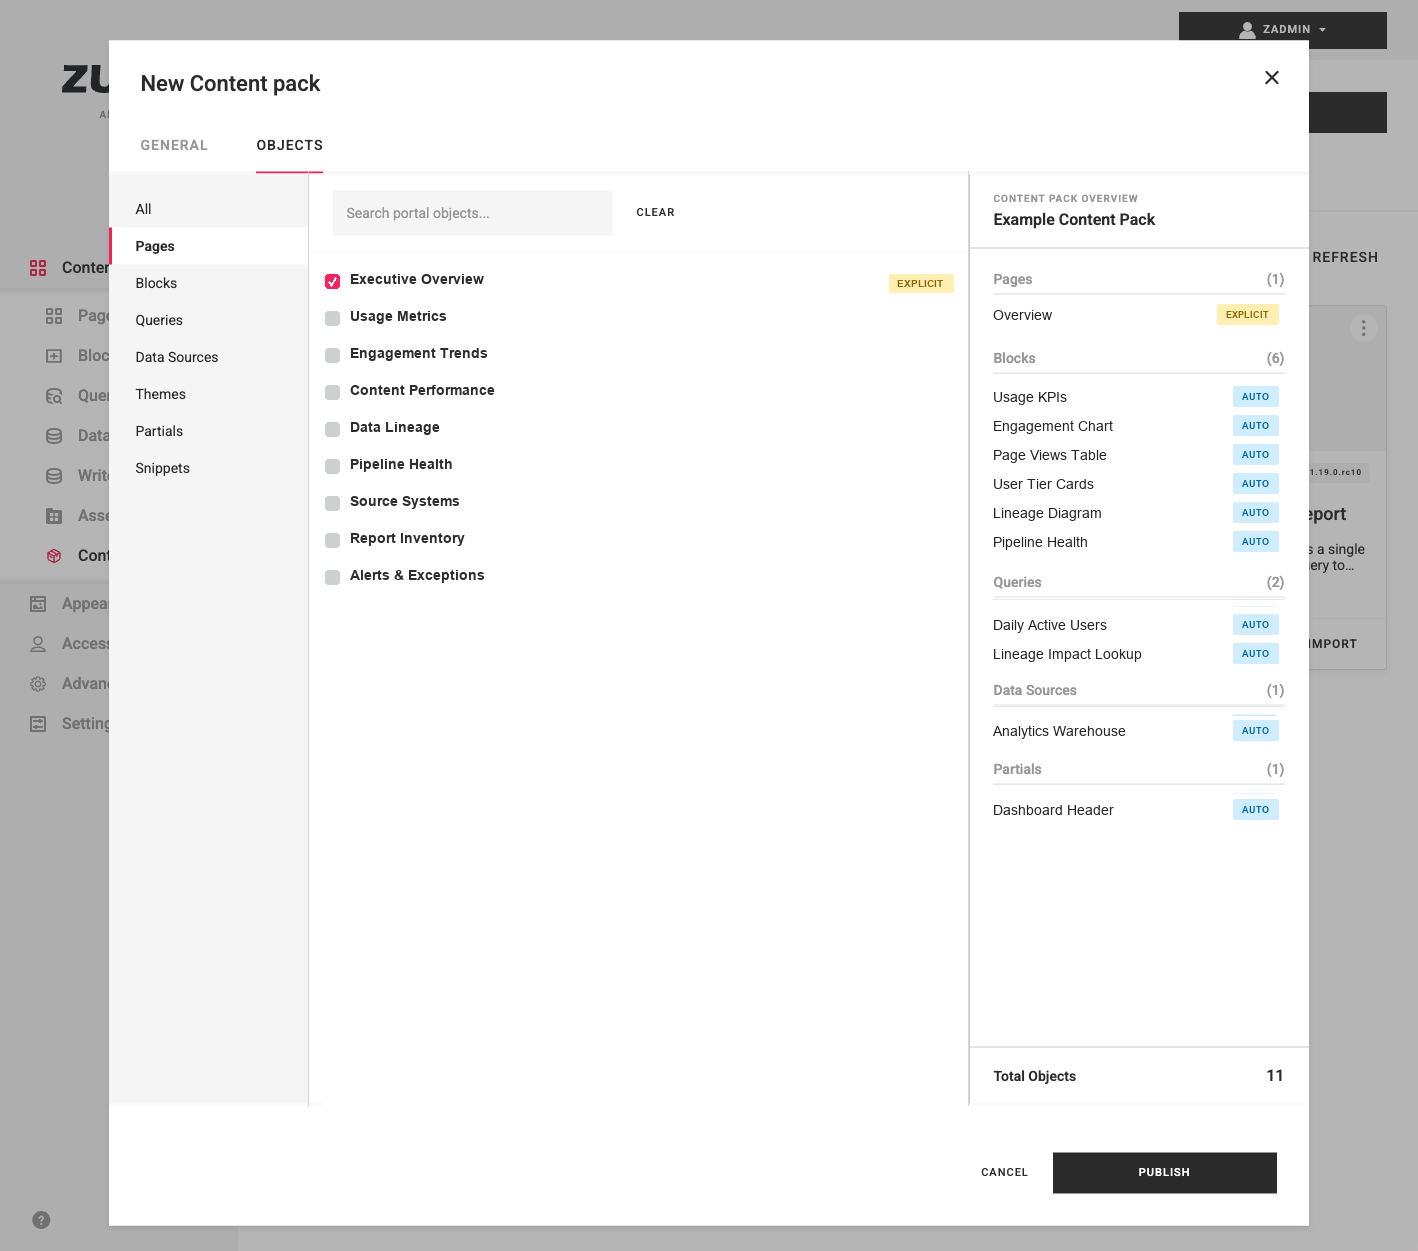
- On the Objects tab, select the objects to include. Dependencies are added automatically and marked
AUTO; objects you select directly are markedEXPLICIT. The overview shows a running total. - Click Publish.
Once published, the pack is available to every portal that uses that repository. If a pack with the same slug already exists, you are prompted to overwrite it.