Prerequisites
- Must provision users in both Tableau and Auth0 with matching username or email address.
- Tableau version 2021.4 or later
- SSO via SAML for Tableau with Auth0 as IdP configured and tested
- Note that Auth0 is another Okta product but the setup is very different
Configuring Auth0 for Zuar Portal
TBD: Auth0 Dev vs Production environment
Auth0 allows creating applications in different environments (e.g. dev, production). The environment is selected via a drop-down in the upper-left once you login to the admin UI. Unsure at this time if there is any impact to applications in each environment.
Create new Auth0 Application
- In Auth0, expand Applications in the left sidebar, click on Applications
- Click Create Application (blue button in upper-right)
- In the Name field, enter a name for the application, e.g.
Zuar Portal. (If you have more than one Portal, add an identifier (e.g.Zuar Portal - Production). - Under Choose an application type, select Single Page Applications.
- Click Create
- Your new Application should now be displayed in the list, click on it to configure the application
Assign users to Zuar Portal application in Auth0
- If you’re not already editing the Application, click on the Zuar Portal application you made in the section above
- Click on the Connections tab
- Ensure the auth methods (e.g.
Username-Password-Authentication) are turned ON (switch is moved to the right and the control turns green) for the users that will login to Portal
Add and Configure SAML for the application
- Go to the Addons tab in the newly create application and turn ON SAML2 WEB APP (switch is moved to the right and the control turns green).
-
Click on the SAML2 WEB APP button to configure SAML.
-
Go to the Settings tab in the SAML window that appears
-
Enter the following text into the Application Callback URL field (NOTE you must substitute your
; do not include angle brackets): Zuar Portal 1.11.2 and earlier: Zuar Portal 1.12.0 and later:https://<ZUAR PORTAL URL>/saml/ssohttps://<ZUAR PORTAL URL>/login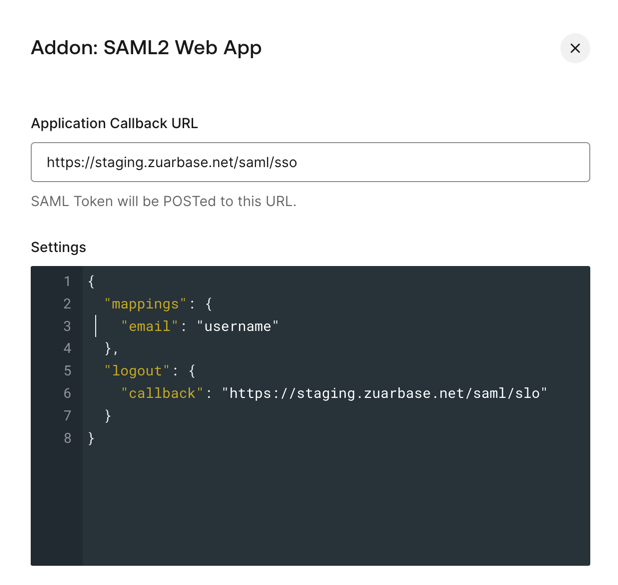
- Copy/paste the following values into the Settings area (NOTE you must substitute your
on line 6; do not include angle brackets): Zuar Portal 1.11.2 and earlier: Zuar Portal 1.12.0 and later:{ "mappings": { "email": "username" }, "logout": { "callback": "https://<ZUAR PORTAL URL>/saml/slo" } }{ "mappings": { "email": "username" }, "logout": { "callback": "https://<ZUAR PORTAL URL>/logout" } } - Scroll down and click Save at the very bottom of the SAML window to apply the changes

Send Metadata to Zuar
- After saving the previous steps, go to the Usage tab of the SAML window (you may have to scroll back up to the top of the window to see this tab)
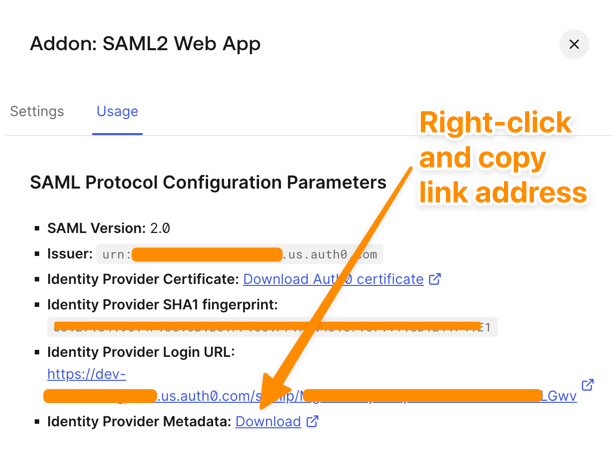
- Under Identity Provider Metadata, right-click and Copy Link Address. Send this URL to your Zuar contact.
Add Groups to SAML Assertion
If you want to use your users' group data to control access in the Portal, you must include that information in the SAML assertion. In Auth0 this is done using Actions.
- From the left hand menu, click Actions → Library

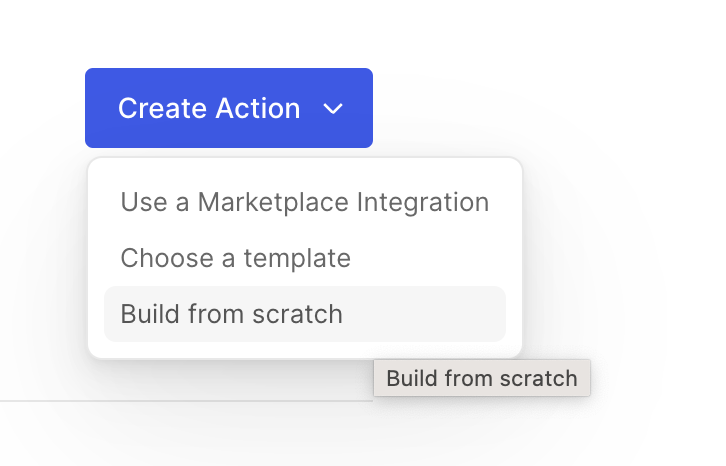
- In the top right, click Create action dropdown, then Build from scratch
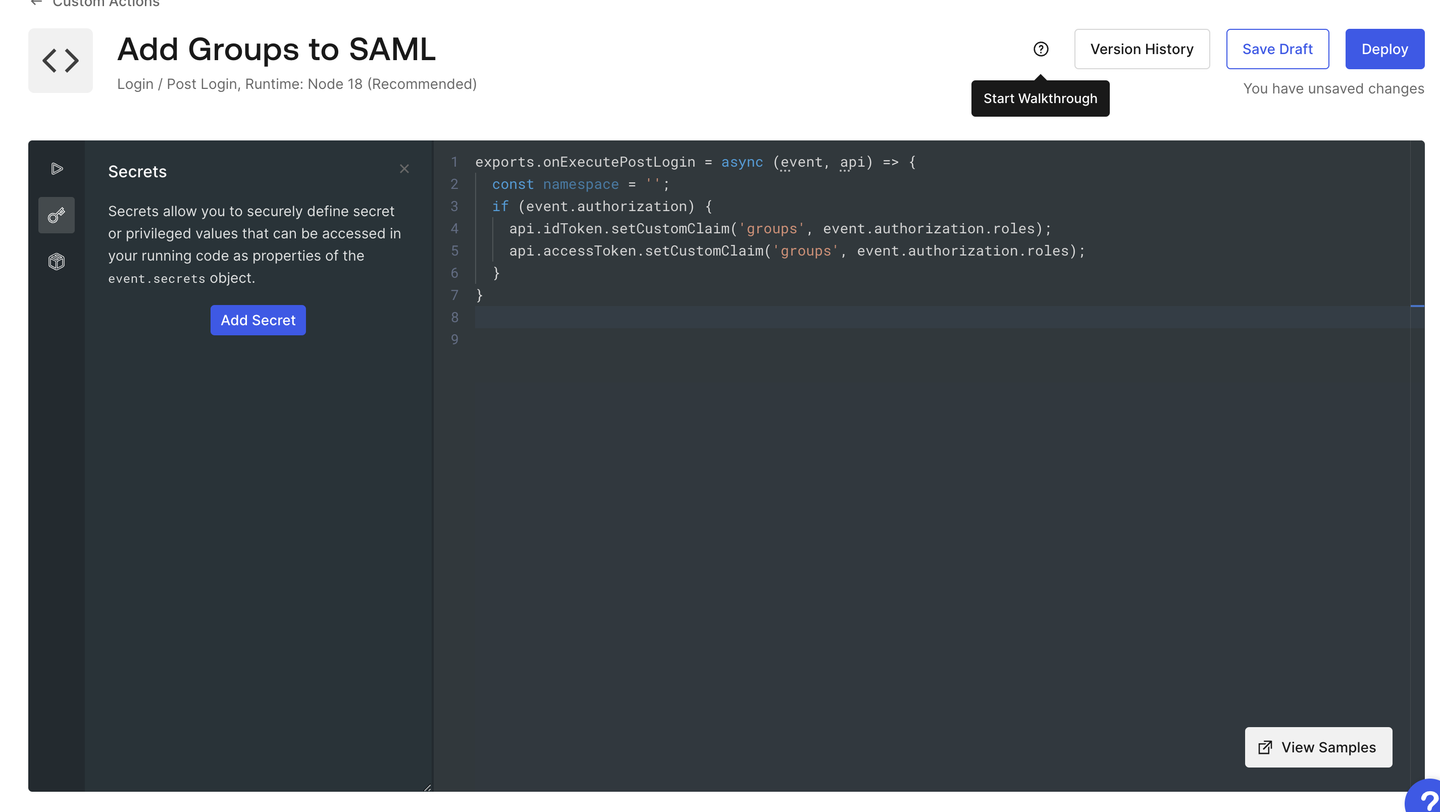
- Give the action a name like “Add Groups to SAML Assertion” and click Create.
- Paste the following code into the editor. Be sure to remove any existing code or comments:
exports.onExecutePostLogin = async (event, api) => { const namespace = ''; if (event.authorization) { api.idToken.setCustomClaim('groups', event.authorization.roles); api.accessToken.setCustomClaim('groups', event.authorization.roles); } } - Click Save draft and then Deploy buttons.
- From the left hand navigation, click Actions → Flows. Then click the Login card.
- On the right hand side, click the Custom tab to show your Custom actions.
- Drag your newly created Custom Action into the flow below “Rules (legacy)”.
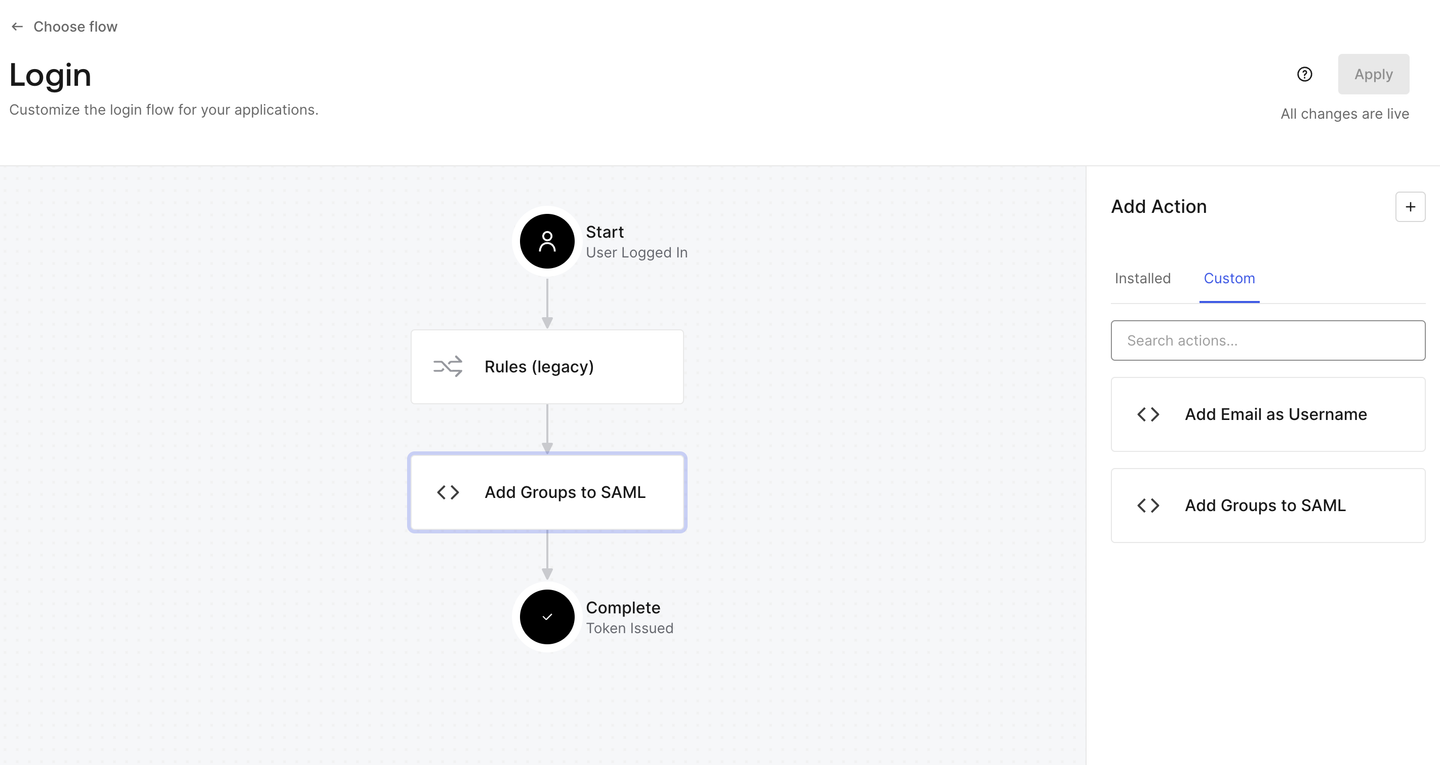
- Click Apply.
Create Tableau Connected App
Login to Tableau as an admin and create a Connected App
- Settings > Connected Apps > New Connected App > Direct Trust
- Enter a name for the App such as “Zuar Portal” and click Create.
- Click Generate New Secret.
- Click “Back to Connected Apps”
- Click the three dots on the row for the Connected App and click Enable.
- Send the following values from the newly created Connected App to Zuar:
- Client ID
- Secret ID
- Secret Value
Automatically provision users
Tableau Server does not support user sync (via SCIM) at this time.
Tableau Cloud does not support user sync (via SCIM) with Auth0 at this time, although other IdPs are supported.