The following tutorial will walk you through a step-by-step process for building a PacMan game with Scratch. Scratch is a project of the Lifelong Kindergarten Group at the MIT Media Lab. With Scratch, you can program your own interactive stories, games, and animations — and share your creations with others in the online community. Let's get started!
We will be building a PacMan game without the maze. You will be able to use the arrow keys to control PacMan, and the objective is to try to collect as many balls as you can without getting touched by the ghosts. Each time a ghost touches you, you lose a life. When you run out of lives, the game ends!
Who is this for?
- Coding experience in language: Intermediate
- Juni Level: Scratch Level 2
- Challenge Level: Medium
What you will learn
Core concepts practiced:
- Cloning
- Functions
Prerequisite concepts to know/review:
- Loops
- If statements/event listeners
- How to move sprites/change costumes
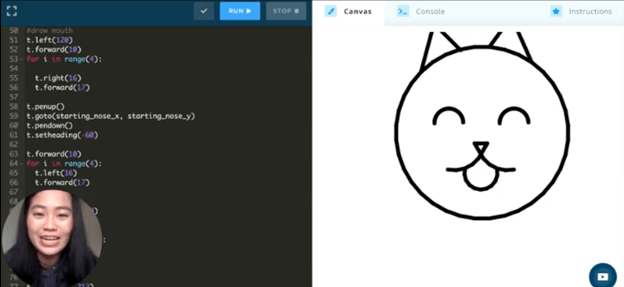
Click run to see the project yourself below! You can also view my project solution code if you get stuck.
Before you start, consider the following:
- How does the game start and end?
- What are the interactions between sprites?
PacMan and ghost collisions, PacMan and ball collisions
3. What are the interactions between the user and the game?
Click to start, arrow keys to move
4. Pay attention to our variables!
When does the number of lives change? When does the number of points change?
General order of steps to implement:
- Set up game beginning
- Set up game basics
- Moving PacMan & ghosts
- Set up points & lives
- Creating balls
- Creating variables & changing them appropriately
- Use functions to reset the ghosts when appropriate
- Add any bonuses you want!
Feel free to use this PacMan project game template in Scratch that we created to help you get started.
How do we do each of these steps?
Step 1: Let’s start by setting up the beginning of the game!
- Add code so that when the flag is clicked, you set the rotation style, initial position, initial direction, initial size, and visibility of each ghost and PacMan.
- Add code so that when the flag is clicked, you set the visibility and costume of the click to start button.
Step 2: Now let’s set up the basics of the game!
- Add code so that when the button is clicked, it switches costumes (with pauses in between) to demonstrate a countdown, and then disappears and broadcasts a message to start the game.
- Add code so that when the game starts, PacMan starts moving continuously, and set it up such that an ‘up’ key press turns him upward, and ‘down’ key press turns him downward, a ‘left’ key press turns him to the left, and a ‘right’ key press turns him to the right.
Hint: “continuously” means that something will keep happening constantly forever!
- Add code for the green, orange, and red ghosts so that when the game starts, they turn in a random direction and then start moving continuously. Make sure to ensure that they’ll bounce if they hit an edge!
- Add code for the green, orange, and red ghosts so that when they touch PacMan, they broadcast a message saying that PacMan touched a ghost.
- Add code for the blue ghost so that when the game starts, it continuously points towards PacMan and then takes 3 steps in his direction.
- Add code for the blue ghost so that once the game has started, if it touches PacMan, it broadcasts a message saying that PacMan touched a ghost.
Step 3: Let’s add ‘lives’ to the game and set up the end!
- Let’s create a variable to keep track of PacMan’s lives, and set it to 5 when the flag is clicked.
- Add code so that when PacMan is touched by a ghost, he loses a life.
- Add code so that if PacMan gets to 0 lives, he broadcasts a message saying that the game is over and then hides.
- Add code so that when the game is over, all of the ghosts hide.
- Add code so that when the game is over, our button reappears and switches to the ‘game over’ costume.
Step 4: Let’s set up the balls and points!
- Add code so that when the game starts, you set the size of the ball and make it disappear and then create a bunch of clones (I did 20 for my game, but you can do more or less!)
- Add code so that when a ball clone is created, it goes to random position and then appears.
- Create a variable to keep track of your points, and set it to 0 when the flag is clicked.
- Add code so that when a clone touches PacMan, it increases the number of points you have, creates a new clone, and then deletes itself.
Step 5: Let’s use functions to reset the ghosts when appropriate!
- Using the My Blocks section, create a new function for each ghost called reset.
- Move your setup code from when the green flag is clicked for each ghost into the reset function definition; now, when you use the ‘reset’ block, that code will run!
- Use the reset block you made to run the reset code for each ghost when the flag is clicked, and when the ghost touches PacMan.
Your game should now be ready to play!
Want more of a challenge? Try adding these bonus features.
- Add a different color ball that, when you eat, turns all of the ghosts blue for a certain amount of time and when PacMan eats them, he gets 10x as many points!
Hints:
- You can use a variable to keep track of whether or not the game is in this special state
- You can use broadcasting to let all of the sprites know that the state has started
- You can use a loop and a variable to make a timer, to help the state last for a limited amount of time.
2. Add some different sprites that when PacMan eats, he gains a life!
Hint: you can use pretty similar code to what we did for the ball clones!
3. Add background music to the game, and sound effects for when PacMan eats a ball or a ghost!
Great job — now check out more tutorials!
Hope you had fun making this project! Every week, we’ll be posting project tutorials like this one, for different coding languages and experience levels, as well as math tutorials.
Visit our coding projects blog page to find our other tutorials in more coding languages! You can also subscribe to our newsletter using the form to the right of this page for more updates on our programs and newest coding tutorials.
Need more help, or want to keep learning?
Looking up your coding questions is one of the best ways to learn! Another great way to learn is from an experienced coder or instructor.
Juni Learning Computer Science Instructors like Maya work closely with students ages 8-18, and are specially trained to adapt to each child's unique learning style, pace, and interests. Read more about Juni's coding courses and curriculum, or get started with our Admissions Team to learn which course is best for your student’s coding journey.
Ready for more? Check out other tutorials from Zuar...
