Snowflake’s Data Deletion Process
Snowflake is a powerful BI and data platform gaining rapid popularity among data teams in various organizations. Read more about the pros and cons of Snowflake here. One of the key features it brings to the table is built-in support and strong user experience for common DBA tasks, such as Change Data Capture, RBAC & Entitlements, and Data Preservation. This simplifies the process to safely delete a table in Snowflake.
Snowflake globally administers and maintains a mechanism for data checkpointing, deletion, and recovery within their system called Time Travel. Time Travel provides methods to call where a user may have previously deleted data which needs to be recovered. Snowflake follows the guidelines in their Continuous Data Protection Lifecycle to dictate when data is checkpointed, deleted, or recoverable.
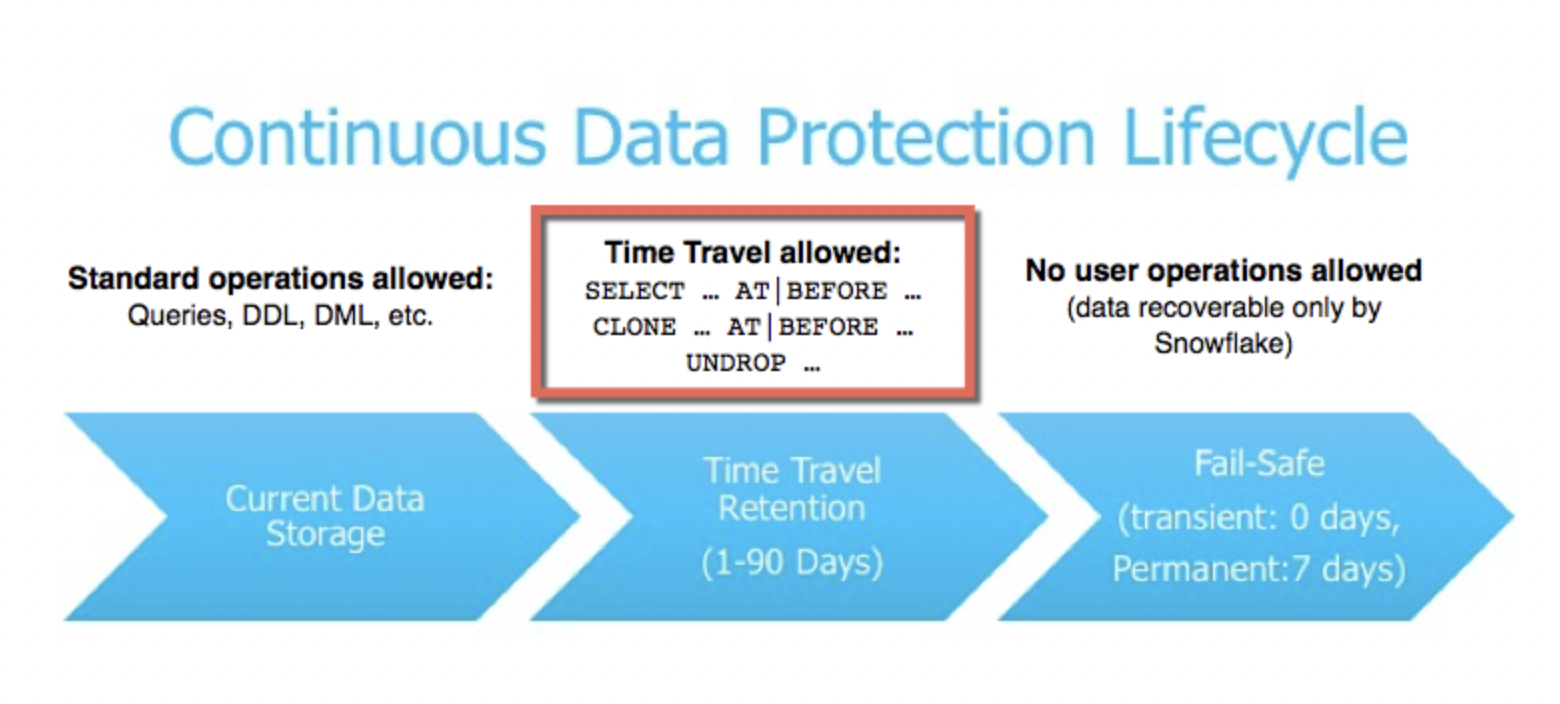
Source: Snowflake - Time Travel
The middle tier depicted in the above figure, Time Travel Retention, allows users to write queries on previously checkpointed data according to the amount of time set by the Account Administrator. According to Snowflake: The standard retention period is 1 day (24 hours) and is automatically enabled for all Snowflake accounts. This retention period can be updated by an ACCOUNTADMIN role in the following object parameter: DATA_RETENTION_TIME_IN_DAYS. Alternatively, an organization can set a MIN_DATA_RETENTION_TIME_IN_DAYS to apply a minimum requirement for all data objects.
Note: The ability to set Time Travel beyond 1 day (24 hours) is only available to Snowflake Enterprise Edition users.
 Justin Freels

Role-Based Access Controls
One core responsibility of a DBA/Snowflake Administrator is to heavily restrict data deletion and drop table access using Snowflake’s built in Role-Based Access Controls. Roles can be customized individually to what best fits the organization’s needs. However, there are certain default roles which follow a pattern:
- ACCOUNTADMIN - Top level administration role with full access to all database objects / grants.
- SECURITYADMIN - Role with the ability to manage and modify grants or users.
- SYSADMIN - Role with the ability to create and own database objects and customize privileges for owned database objects.
- PUBLIC - Default base role with access to objects exposed to, or created by, this role.
Privilege grants can be further customized: GRANT <privileges> TO ROLE - Snowflake Documentation

Data Deletion & Recovery
Setting up an environment for protecting access to database routes
Note: This requires a Snowflake account with ACCOUNTADMIN role or custom role with granted OWNERSHIP privileges over the database objects in use.
For the purpose of this demonstration, I will be using the Snowflake Sample Data Sets.
1. Create working database & schema:
CREATE DATABASE sample_data;
CREATE SCHEMA sample_data.tables_to_drop;
USE DATABASE sample_data;
USE SCHEMA tables_to_drop;
2. Create a table from the Snowflake Sample Customer Dataset:
CREATE TABLE sample_data.tables_to_drop.customer
data_retention_time_in_days=1
AS SELECT * FROM snowflake_sample_data.tpch_sf1.customer;
3. Create and hydrate an Internal Stage with customer data:
Note: in this example, we set the DATA_RETENTION_TIME_IN_DAYS to 1 day.
CREATE STAGE sample_data.tables_to_drop.customer_stage
FILE_FORMAT=(TYPE='CSV')
data_retention_time_in_days=1;

COPY INTO @customer_stage/customer.csv FROM customer
FILE_FORMAT=(TYPE='CSV');
4. Validate that we have data in a table and stage:
SELECT count(C_CUSTKEY) FROM customer;
SELECT count(C_CUSTKEY) FROM @customer_stage/customer.csv;
Dropping and recovering a table
1. Drop the customer table:
DROP TABLE customer;
SELECT count(C_CUSTKEY) FROM customer;
We should not see any data present in the above SELECT statement.
2. Reverse the previous drop transaction:
UNDROP TABLE customer;
SELECT count(C_CUSTKEY) FROM customer;
We should see the previous data present in the above SELECT statement.
Deleting data from a stage
Within a stage, we can quickly remove files:
Note: Dropped stages or files can generally not be recovered within Snowflake, they must be re-imported.
REMOVE @customer_stage/customer.csv;Removing data from a table
1. Delete specific rows from the table:
DELETE FROM customer WHERE C_CUSTKEY = 60001;
SELECT * FROM customer WHERE C_CUSTKEY = 60001; // This should not produce results
2. Recover rows from immediately before the previous transaction occurred:
// Advanced - Get the data before the last transaction (checkpoint)
// Requirements - Go to Home > Activity
// Use the Query ID as <uuid> below
SELECT * FROM customer before(statement => '<query_id>')
WHERE C_CUSTKEY = 60001;
3. Recover rows from a specific date / time:
Follow the format: YYYY-MM-DD H:MM:SS. See Snowflake Documentation for more available formats.
Note: This datetime must fall within the range set by DATA_RETENTION_TIME_IN_DAYS.
// Advanced - Get data from a checkpoint based on timestamp
SELECT * FROM customer at(timestamp => '<YYYY-MM-DD H:MM:SS>'::timestamp)
WHERE C_CUSTKEY = 60001;
Related article:
Greg Rossi

What Next?
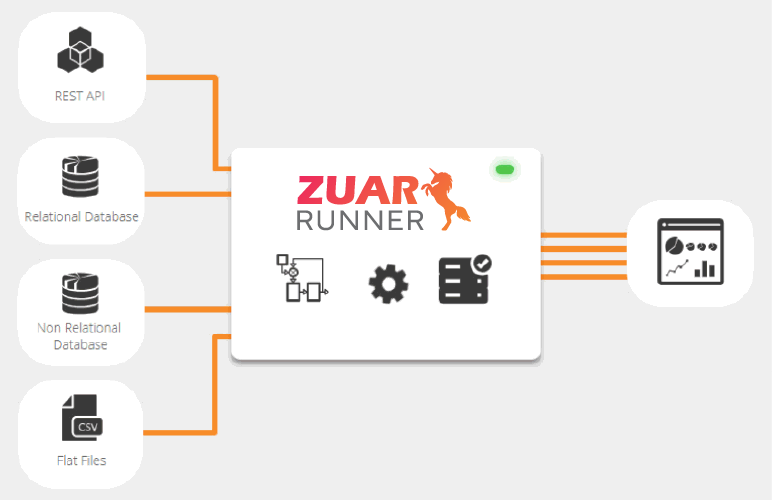
If you're looking to connect Snowflake with the other services you use, we at Zuar strongly recommend using an automated ELT solution, like Runner. This solution comes with pre-built integrations with a number of database technologies (including Snowflake) and allows you to run all sorts of transformation jobs while placing them all on automated schedules. Click here to learn more about Runner.
You can also schedule some time with one of our data experts at the link below, to have your questions answered and needs assessed: